What you need | How to roll a joint
There are plenty of ways to enjoy your cannabis, from edibles to bongs and dabs, but none have the lasting appeal of the simple joint. But making a good joint is a bona fide skill. If it’s your first time rolling, it’s an undeniably daunting experience, with many steps to complete and likely a bunch of friends waiting for your creation to be complete. It takes a long time to master rolling a joint – you can always improve in some way – but the most important thing is making something smoke-able. And luckily, with a bit of guidance, this isn’t too difficult to achieve at all.
TL;DR
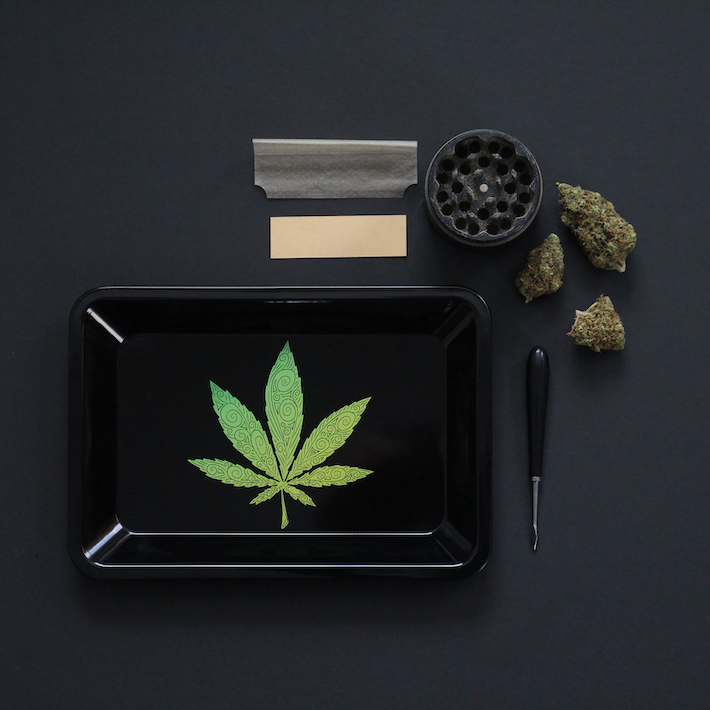
- You need papers, weed, ideally a grinder, some flexible card to make a filter, and optionally a rolling tray and something like a chopstick to tighten up the joint at the end.
- Grind up your weed, pick it apart with your fingers or cut it with scissors.
- Make a filter – fold the end of the card into a W shape and wrap the rest around to form a cylinder.
- Put the filter at the end and pack the weed into the joint – make it a little thicker than the filter, and add more at the opposite end if you’re aiming for a cone shape.
- Roll the paper back and forth with your index fingers and thumbs to form the weed into a tube.
- Tuck the front end of the paper behind the tube of weed, then roll up the joint.
- Lick the gum strip and seal the joint.
- Push the weed down from the open end to leave around a half-inch of space.
- Twist up the spare paper at the top.
- Smoke!

What You Need to Roll a Joint
Before you start rolling, you need to make sure you have everything you need. A lot of this is common sense, but if you can gather some of the optional items as well it will make your experience easier.
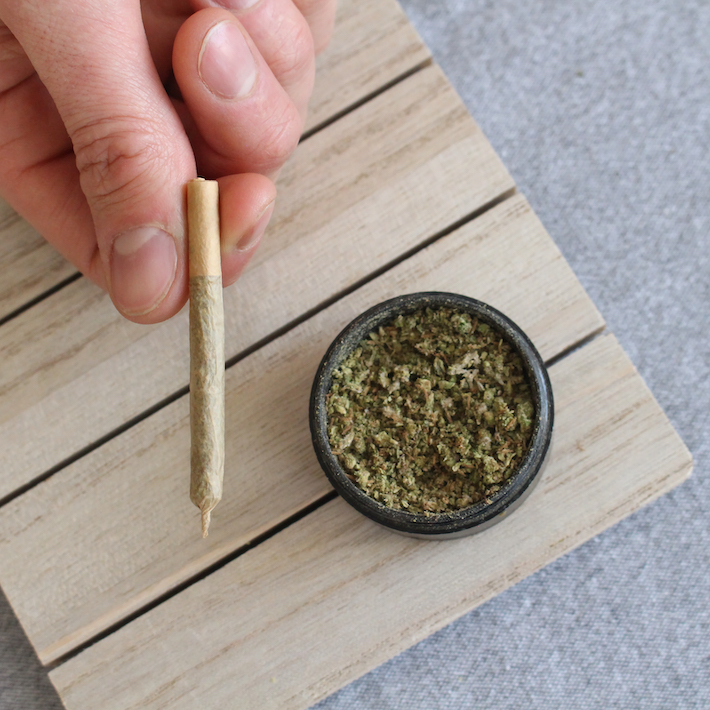
- Weed: Obviously. It’s generally recommended to use 1/3 to 1/2 of a gram per joint.
- Grinder: Technically optional but highly recommended. You can pick the bud apart with your fingers or cut it with scissors, but a grinder is intended for the purpose and does a much better job with less effort.
- Rolling papers: Also kind of obvious but there is a lot to consider beyond the basics. Many people swear by hemp rolling papers, because they offer good support without being too thick and don’t impact the flavor much. However, when you get more comfortable, thinner papers have advantages in terms of minimal impact on flavor and burning more slowly. Sizes are also an important consideration: although you might want to go for a king size (better for bigger groups of people – four or more) rolling is generally easier if you go with a single wide or a 1 ¼ inch.
- Filter/crutch/roach material: You need some thin, flexible cardstock or thick paper to make the filter, crutch or roach (basically all words for the same thing). Many packs of rolling papers include some suitable card in the package.
- Rolling tray: This is optional, but it’s a big help when you’re getting started in particular. This is basically because the process can be a bit messy when you first try, and the tray will help catch any debris. Also it’s a lifesaver when you drop everything out of the joint – which happens even to seasoned rollers!
- Pen/chopstick/anything similar shaped: This is optional but helps with packing the joint down.
How to Roll a Joint (7 Steps)
So you’ve hopefully gathered your material and are ready to go. So here’s what you need to do to roll a perfect joint:
Time needed: 5 minutes
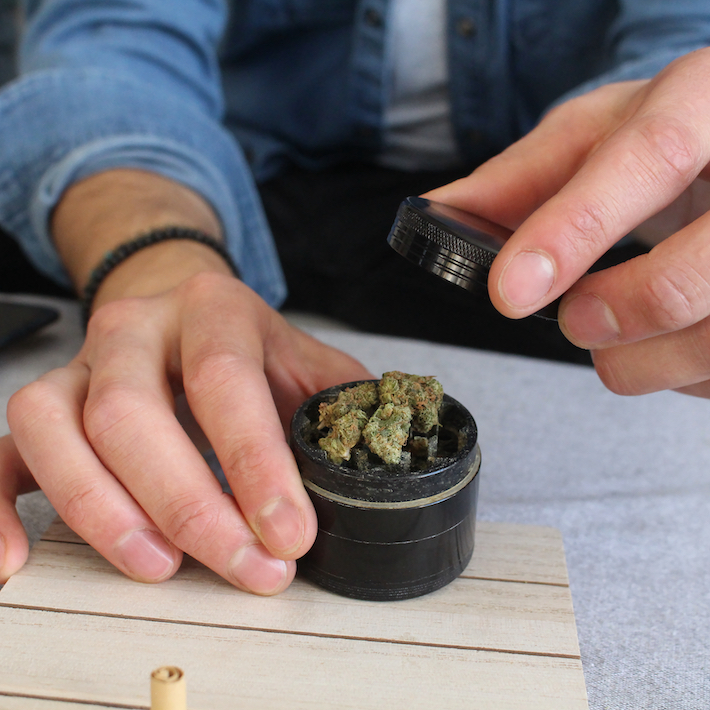
- Grind Up Your Weed
The first step is grinding up your buds to get the weed ready to add to your joint. The process is really straightforward: open up the section of the grinder with the teeth, and place some chunks of weed in the space and close it up. Most grinders have a magnetic closing system in the center – avoid getting weed on this part because it will get smushed into the spot and be hard to get off again. When you have it closed up, rotate the sections of the grinder against each other and it will crush up the weed. Many grinders have multiple sections, with holes in the bottom teethed portion so the ground up bud falls through into a lower compartment for using later. If this is the case, when it falls through it’s ready to go. If not, just grind it until the pieces are nice and small – think a bit smaller than a grain of rice.
If you pick it apart with your fingers or cut it with scissors, it will be a longer process but it works in the same way.
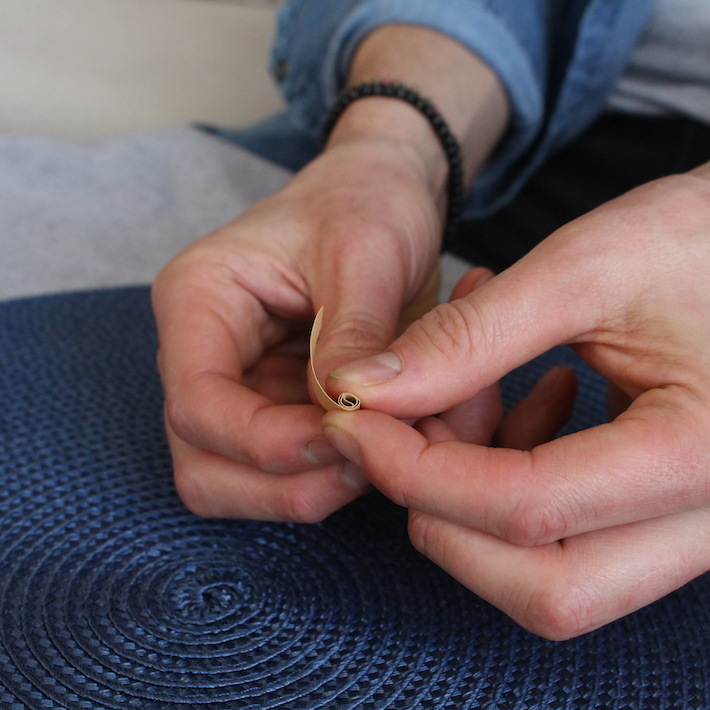
- Make the Filter/Crutch/Roach
Get the cardstock or thick paper ready to make your filter or crutch. There are two simple ways to do this: either the easiest way or the slightly better way.
The easiest approach is to basically roll the card up into a tube, with a hole in the middle for air to pass through. So you’ll basically have a tube of card with a space in the middle. The diameter of the hole is variable, but if you’re using this basic approach it’s good to keep it narrower, around 5 mm or a little more is usually good.
The better approach makes use of the perforated section of card usually found at the end of the material that comes with a pack of papers. You bend the perforated section into a “W” or “M” shape, bending one section in one direction, the next in the opposite direction and so on. This basically makes an actual filter for the end of the joint. Then you simply wrap the remainder of the card around it. This produces something a lot like the previous version, except with the W-shaped card in the middle. You can do many more complicated designs as you gain experience.
One thing that’s worth stressing is that the size of your filter has a big influence on the size of the overall joint. If you make a thick roach – often hard to avoid with the “W” style – you’ll have a chunkier joint. Personally when making cone-shaped joints I stick with thinner filters, but this is very much down to individual preference. - Fill Your Joint
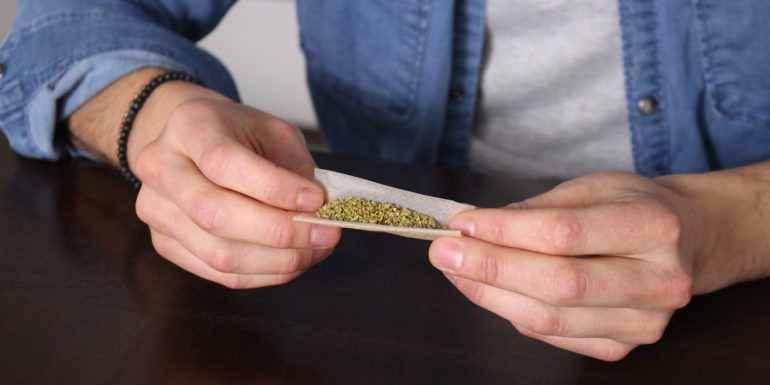
Now you’re ready to start building your joint. Prepare the paper so that the gum strip is on the inside and facing towards you. It helps to lay it in something for the preparation process – you can use purpose-made rolling tools but the container for the papers works nearly just as well.
Place your filter at one end of the crease in the paper, with the tip roughly in line with the end of the paper. You can use either side, and despite some understandable assumptions, people’s preferences don’t always correlate to their dominant hand. You’ll have to work it out through experience, but for the first time go with the side of your dominant hand.
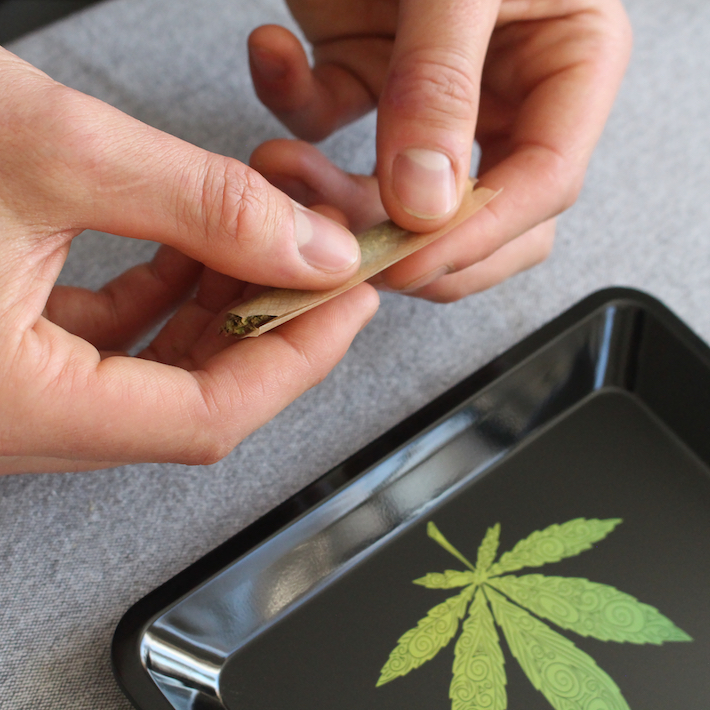
Now fill the remainder of the joint with weed. The simplest approach is to make the filling consistent across the length of the joint, using the size of the filter as a guide. You want the layer of weed to be a bit bigger than the filter, because it will get compressed a little in the next stage. If you want to make a cone-shaped joint, the best thing to do is taper your filling, so there’s more weed at the far end and less near the filter. - Roll, Roll, Roll
Now you need to actually roll the joint, basically compressing the cannabis you have in there down into a kind of “weed sausage.” This is easy to do. Pick the paper up (carefully!) by pinching the paper between your thumbs and index fingers, and then flatten your index fingers along the back and use your thumbs on the other side of the paper to roll the mixture up and down. Essentially you’re moving the front and back halves of the paper up and down. As you go you should feel the weed on the inside start to take on a tube shape. When it starts to feel tube-like, you can finish this stage – but it doesn’t hurt to do it a little more if you’re not sure.
- The Tuck and Seal
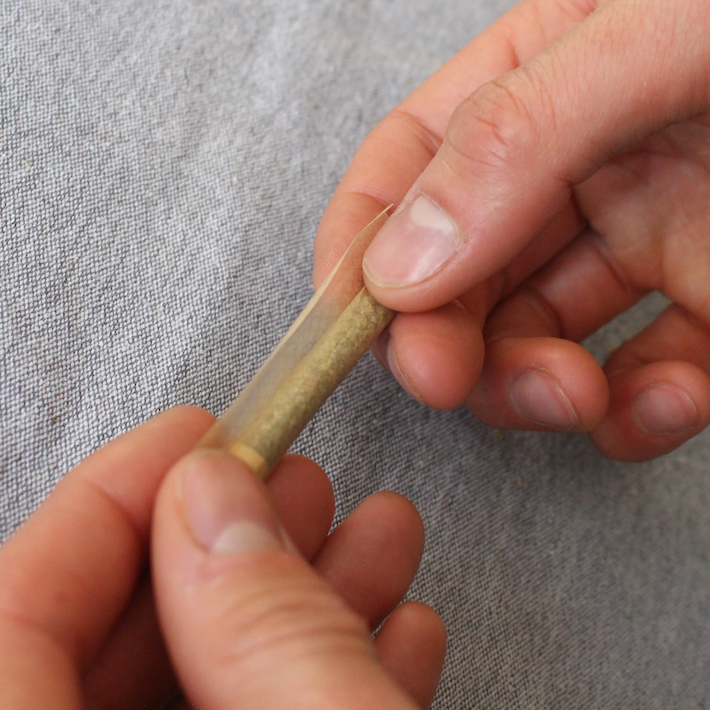
The hardest part of rolling a joint is getting from this point to actually rolling up and finishing the joint. The challenge is turning the simple up-and-down motion of the paper into rolling the paper into a tube.
First, roll downwards so the front edge of the paper just comes up over the line of weed, then tuck the front edge down behind it (you can use your fingernails), touching the back section of paper, and continue rolling up. I handle this part a little differently to most: more like a tiny fold than tucking it in. Switch to holding the joint between your index and middle fingers, with your thumbs underneath for support. Then pinch it at the top and literally fold the tube up and over towards the rest of the paper. I do this with my thumbs and move my index fingers out of the way as I fold. From there you can just roll up as usual.
If you’re making a cone, you need to incorporate this into the rolling process. The front line of paper should be slightly diagonal to make room for the extra thickness at the end. This comes fairly naturally if you’ve distributed your weed right, but it’s something you can work on as you gain experience.
Sealing it is easy: just lick (lightly) along the gum strip and finish the rolling process, making sure everything sticks down.
The most important part here is the section where the filter is. This can make or break your joint. You need to make sure it’s tightly-rolled here so everything stays together. Some people even recommend sealing this part first to make sure everything works nicely, but as long as you pay special attention to it things will be fine. Again, this is the most challenging part. Don’t worry if it doesn’t work at first – stop before trying to seal the joint and give it another go. Once you have this down then your joints will be great every time. - Push or Tap it Down
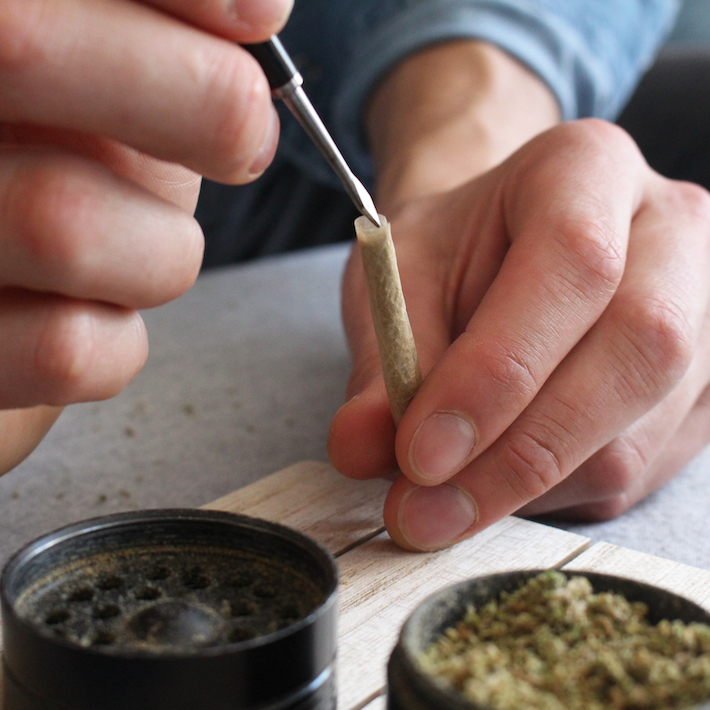
It’s likely that at this stage you have a loosely-packed joint. Use your chopstick, pen or whatever tool to push the weed down from the open end. You want it to be tight but not too tight. If you push it so there’s around 1 cm to half an inch of space at the end it’s probably good. However, this is something that comes with practice. An easier approach is to tap the joint on a hard surface from the filter side. Simply hold the joint loosely between your fingers and bang the filter on a table or book. This helps you avoid producing something that’s too tight to smoke comfortably.
- Twist the Top and Light it Up
It’s good practice to twist the loose paper at the top after you push or tap it down. This is important if you’re taking the joint somewhere, but useful either way. Some people combine this with a little push down to flatten the top, but it doesn’t matter too much. Now you can just light up and enjoy.

Well Done!
It doesn’t matter if your joint isn’t perfect. If you can smoke it – congratulations! Rolling a joint is a common activity but not an easy skill. It’s a rewarding process if you keep working at it, as you get better and better, your joints will start to look more and more dispensary-quality. You’ll learn little tricks as you go, and the practice will hone your skills nicely. But don’t be discouraged if you struggle at first: my joints are pretty good now but for the first month or so they often had some glaring issues. You just improve as you go.